Donnerstag, 31. Januar 2013

Mesh Wreath Shopping: a little guide.

Today we would like to bring up a quite delicate question: how do I distinguish a high quality deco mesh wreath from a poor one?

One of the most popular marketplaces for handcrafted goods is Etsy. On Etsy, you can find everything from wood work and handmade kids clothing, over fancy hats and paintings, to extraordinary jewelry and, last but not least, deco mesh wreaths. The price of a mesh wreath can be anything between 30 $ and 150 $, not included the cost of shipping. The average price paid for a mesh wreath is 98 $, plus whatever you will be charged for shipping. 98 $ is quite a number, and for that reason you really want to make sure, that you are going to buy a wreath of high quality, crafted with durable material and skilled hands.
Deco mesh is made of plastic, which is why it is often referred to as poly mesh. It is a very durable, long-lasting and weather resistant material, and therefore the perfect choice for an outside wreath. A deco mesh wreath can bring you years of joy, without fading colors or dried out branches. However, the average 98 $ are only well spent if your mesh wreath was crafted with high quality material, from someone who is skilled in this craft. How do you recognize a professionally crafted mesh wreath, that is well worth the money? Today we are going to share some helpful tips with you about mesh wreath shopping!
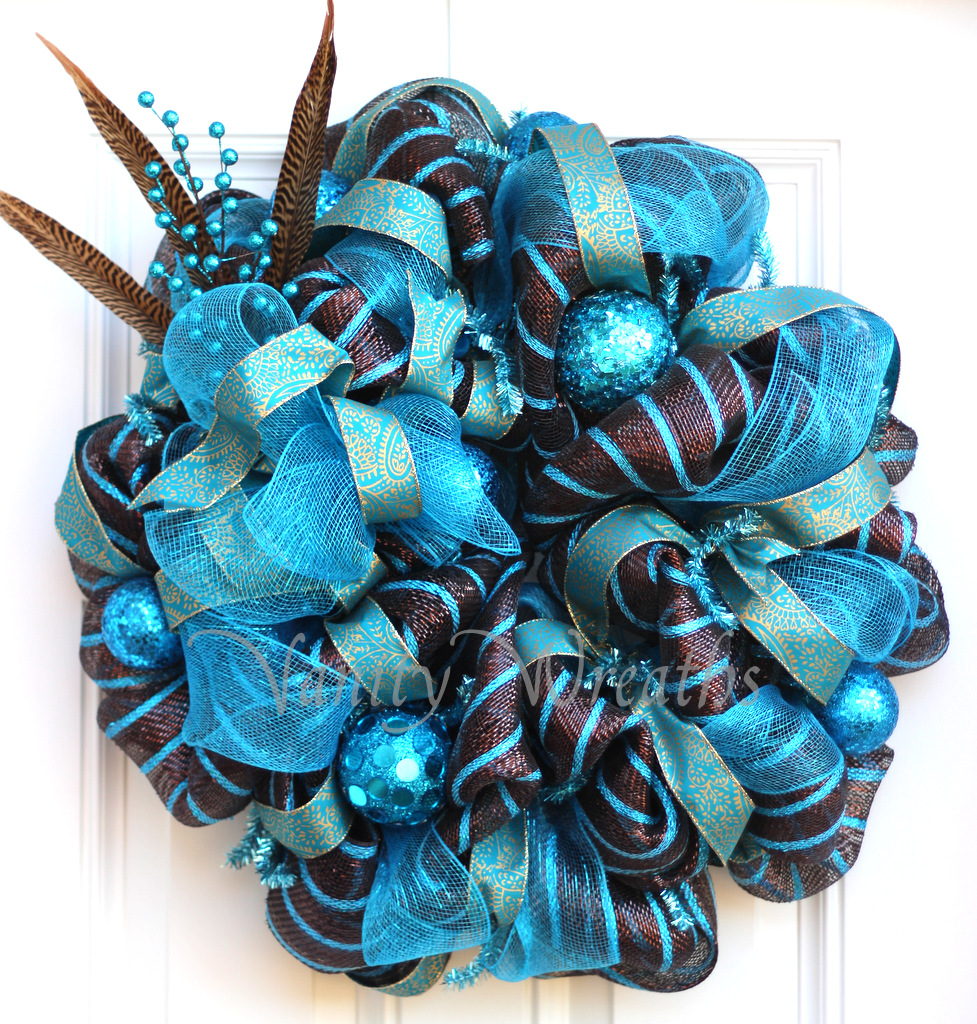
  1. Take a look at the shape
    Some people like square-shaped mesh wreaths. During Valentine's Day season, we can also find a lot of heart-shaped mesh wreaths. There are even work wreath forms for oval wreaths and wreaths in a cross shape. However, 90% of the mesh wreaths are round and 24 – 30 inches in diameter. The shape of a wreath tells us a lot about the crafters skills. If the wreath you are looking at should be round, but actually isn't, you might wanna keep looking for something more appealing.
    It doesn't take a degree to craft a mesh wreath, BUT it does need some experience to get a mesh wreath in a perfectly round shape. If you see a wreath that has bumps in the shape, the crafter probably just started out and doesn't have enough experience yet. While you can still go ahead and buy this wreath of course, don't get ripped off by paying too much for it! If a wreath has a bumpy shape, it might be possible that the quality of this wreath is suffering in other areas as well! Attached you can find a round and well layered wreath, as well as two not-so-round mesh wreaths.

    Of course we have to mention here, that we have no rights on those 2 lower  pictures. We are showing them for example purposes only.


  2. How look-through is the wreath
    Mesh wreath is a fabric netting and therefore a look-through material. However, crafted in layers, a professionally made mesh wreath should be as little look-through as possible. If you can see a lot of work wreath through the mesh, you are probably looking at the work of a beginner.

  3. You get what you pay for
    It always feels great to get a great deal on a mesh wreath, but don't get fooled by a low price! If someone is offering a mesh wreath for 45 $, the person who crafted it either doesn't want to make money with this wreath (not very likely), or the material and quality is poor. If you consider that the basic cost of a mesh wreath, without any decorative details but a ribbon, is often more than 30 $, 45 $ for a fully decorated wreath sounds way too good! Keep in mind that the ribbon might have been bought at the dollar store, and will pretty much dissolve after a week of rainy weather. Or the sign is made of cardboard instead of wood, and will pretty much dissolve as well over a short period of time. The glitter might fall off the ornaments, and picks will come off due to a cheap glue.
    Instead of going for the cheap price, try to look for wreaths that are on sale, or look for coupons or other sales promotions. This is usually the best way to make a great deal on your wreath!

  4. Avoid disappointment
    Let's get this straight to the point: a skilled mesh wreath crafter will be professional enough to make sure, that the wreath reaches your doorstep save and sound. Make sure that your wreath will be properly secured before it ships out. As an example: Vanity Wreaths wires almost every wreath to the bottom of the shipping box. This is to keep the wreath from moving around, and therefore to keep it's shape and to avoid damage to the decorative details.

We hope that our tips are going to make the mesh wreath shopping easier for you! If you like this article, please go ahead and like us on facebook as well!

Dienstag, 22. Januar 2013

Making a simple headband bow

Sometimes we use the same bows in our wreaths as you can see on headbands and similar accessories. These kind of bows are fairly simple to craft! Today we would like to show you how to craft such a headband bow. If you don't have a glue gun, you can do it with regular glue as well.

Like mentioned above, it doesn't have to be a glue
gun. Regular glue will work just fine. Other than that
you will need a ribbon of your choice and maybe
some pearls, gemstones or whatever you would like
yo use to decorate your bow. Your bow will have half
the length of the ribbon you are going to use.

Fold the ribbon in half by putting the ends exactly
together. 

Press down the part in the center of the ribbon.

You will now have a line running through the vertical 
center of the ribbon.


Add some glue among the line. You have to work
quickly so the glue won't get hard or dry.

Bring each end of the ribbon to the center, and glue
them together. This is what the side will look like that
has the glue seam.

Turn the ribbon around. You are now facing the side
without the seam. Fold the ribbon in a half vertically.

Add a small drop of glue to the center of it and press it 
together. Make sure that both ends of the seam match
perfectly.

This is what it should look like while you are pressing
it together.

If you let go off the ribbon, this is what the side without
the seam should look like, after you glued the center together.

    Now turn it around so you can face the side with the 
     glue seam. Fold the sides with the seam ends towards 
the center. Put a small drop of glue in the center of 
each of the two gaps.

This is how it should look like while you press the 
glue together.

This is how the front (the side without the original seam)
will look like.

Since we don't want people to see the glue stains on our
bow, we decided to attach a small ribbon and wrap it 
around the middle. You can as well put a gemstone,
diamond or something similar to it.

If you attach a small ribbon to it, put a drop of glue in
the center on top of the bow. 

Attach one end of the ribbon to it. Wrape it around once or twice.

Add a drop of glue to the backside of the bow in order
to attach the other end ot it.

And the result will be a beautiful headband bow. You can
use any sort of ribbon for it, however, you will need some
experience to make it look neat with sheer ribbon.


Songbirds

We finished this wreath today and this quote goes so well with it!


Dienstag, 8. Januar 2013

Time of the flowers...

Now that we are 8 days into the year of 2013, spring is just around the corner. While the Christmas season is dominated by ornaments, glitter and lots of reds, spring is the time of the flowers. 

Take a look at our first spring 2013 creation!


Montag, 24. Dezember 2012

Make a Wreath Form for a Deco Mesh Wreath

Today we are going to show you how to make your own work wreath. A work wreath is the most common wreath form used for deco mesh wreaths. Unfortunately, work wreaths are not available at crafting stores like Michaels, Hobby Lobby etc. However, you can find a very basic version of deco mesh there, which you can use in combination with this self-made work wreath.

If you like this tutorial, please like us on facebook as well!

For this tutorial you are going to need:

  • 1 box wire wreath
  • pipe cleaners
You can find both at your local crafting store. If is up to you which color of pipe-cleaners you want to use. You never go wrong with a color that matches your deco mesh though!
For this tutorial we used a 12 inches box wire wreath and 10 pipe-cleaners. You can choose a bigger form if you want, but don't forget that you will then need more pipe-cleaners as well!


In this picture you can see a work wreath with gold pencil twists (left) and a regular box wire wreath (right).


You are going to need a 12 inches box wire wreath form as well as 10 pipe-cleaners.


We will start with the outer ring by placing a pipe-cleaner under the two outer wires right at the crossbar.


Bring the two ends of the pipe-cleaner together.


Tie the two ends of the pipe-cleaner up very tightly! The tighter you tie them up, the less likely they are to slide on the wreath later.


Take a look at this picture. We tied them so tight that the wire started to bend a little bit! (Yes, that's how thight it should be!)


Finish the outer ring by using 5 pipe-cleaners at each one of the 5 crossbars. 


Now we start with the inner ring by doing exactly as we did with the outer ring. Place the pipe-cleaners right in the center between the two pipe-cleaners on the outside by using the 2 inner wires.


Tie it up tightly!


This is what the finished self-made work wreath should look like!


We decided to use a brown mesh with copper tinsel, fall leaves and a big artificial pumpkin! What are you going to use for your work wreath?

Freitag, 21. Dezember 2012

Make A Heart-Shaped Mesh Wreath for Valentines Day

I know... I know... it is not even Christmas yet and we already started to stock up for Valentines Day. How odd is that? But if you consider that Valentines Day is only 8 weeks or so away, it is about time for one of our tutorials!

Today, Vanity Wreaths is going to show you how to make a heart-shaped mesh wreath. If you haven't crafted a mesh wreath before, you might want to skip on this one and try yourself on a round one first. Crafting a heart shaped mesh wreath isn't rocket science, that's for sure. However, your wreath will turn out much better if you are a little more experienced with mesh wreath crafting , since we are going to need very even loops in different sizes.

We added a lot of insider tipps and tricks for you and if you like this tutorial, please like us on facebook and stay tuned!


For this wreath we are using a 24 inches work wreath in heart shape with red tinsel twists. If you don't have a work wreath available, you can buy one of the heart-shaped box wire wreaths from on of your local crafting stores. You are going to need red pipecleaners as well in order to have the tinsel twists just like on our work wreath here.

If you don't know how to make a work wreath from scratch, take a look at our tutorial!


Of course you are going to need a full roll of 21x10 deco mesh, also know as poly or geo mesh. You can find a very basic version of it at your local crafting store. We decided to use a premium red with pink, but a deluxe red or deluxe pink would sure turn out amazing as well!


A work wreath has 2 levels: the outside and the inside level. We are going to start with the inside level! 

You might want to pull up the tinsel twists like we did on the picture. That makes the crafting process easier.


If you have the mesh roll on your left or right side is up to you. But no matter which side it is going to be, it is always a good idea to have a good amount of mesh rolled down and available to grab it.


Gather the mesh between your fingers. Make sure that you gather it evenly. Some of our florists prefer to gather it and fold it in little layers, as shown on the picture.


Place the gathered mesh between two of the tinsel twists, push it down and secure it into the wreath form by twisting the two tinsel twists together.


Twist the tinsel 1 time if you want to add ribbon at a later point, but twist it at least 2 timesif there is not going to be anything added to the wreath that has to be secured by the tinsel twists.


This is what the first tinsel wtist should look like.


The next step is to gather some more mesh. For the form we are using here, we recommend the length of 11 inches, since the wreath form is quite big. If you have a smaller wreath form, you might want to try using 9 inches instead.


This is the first loop on our wreath. Work the mesh around the inside level of the wreath form in exactly the same way as shown. 


Try to have the same length of mesh gathered for every single loop. This will ensure an even shape and a gorgeous wreath base!


After you finished and secured the last loop on the inside level of the wreath form, cut the mesh right behind the twisted tinsel with a scissors.

Start on the outside level and repeat all the steps.


This is how your wreath should look like after you finished with both levels. 

If you used a smaller form, your wreath will not be empty in the mittle, but completely filled with mesh. 

You can now attach ribbon, signs, ornaments or just leave it the way it is. If you want, you can cut the ends of the tinsel twists, or leave them the way they are. It is up to you!

We hope you liked this tutorial! Please don't forget to like us on facebook, as well as you might want to visit our website on www.vanitywreaths.com